IMPLANT TOOLS
-
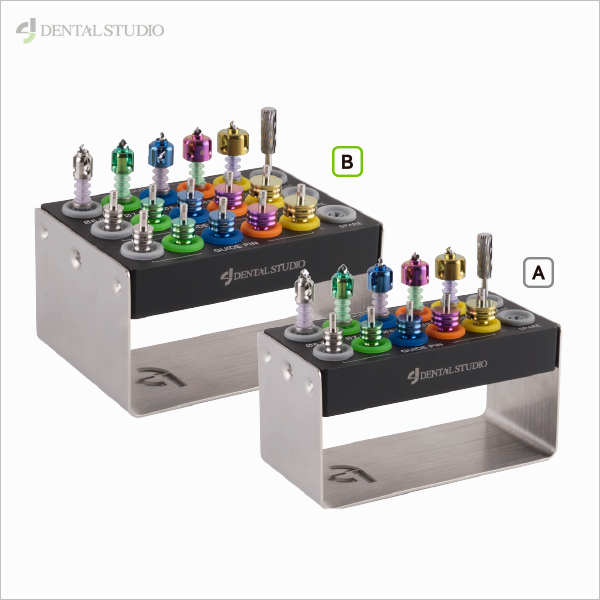
EASY IMPLANT GUIDE KIT
Direction for use COMPONENT 1. Crown Guide Drill (Ø2.7) : 6, 7, 8, 9, 10 It provides guide to the centering, directing and spacing at the same time appropriately for the crown size (implanted prosthesis). 2. Crown Guide Pin (occlusal function applied) : 6, 7, 8, 9, 10 The direction and occlusal check of the crown is possible, and the size and direction of adjacent crowns can be predicted when multiple implants are placed. 3. Crest Trimmer : This is used for flattening narrow and thin bone in width.
-
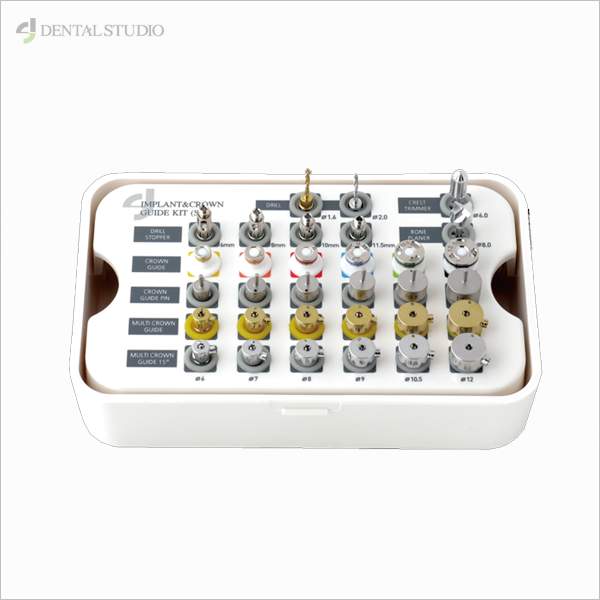
IMPLANT & CROWN GUIDE (S)
Direction for use COMPONENT Initial Drill : Ø2.0 (short), Ø2.0 (long) Used for the initial drilling. ※ Ø2.0 short drill is recommended for a multi guide for accessibility. Stopper : 6mm, 8mm, 10mm, 11.5mm It plays a role of a stopper in the initial drill. Crest Trimmer Ø6, Bone Planer Ø8 : Used to make flat the bone. Crown Guide : Ø6, Ø7, Ø8, Ø9, Ø10.5, Ø12 It provides the guide to the centering and directing with intervals appropriately for the crown size (implanted prosthetics) during the drilling. Crown Guide Pin : Crown Guide Pin It guides in determining the implanting position and crown size before the initial drilling. Multi Crown Guide It provides the guide for the continuous connection to the crown guide pin while two or more implants are being placed. -STR TYPE(Gold), CVD TYPE(Silver) HOW TO USE Measure the size for the crown guide pin using tweezers on the implanting position. Connect a stopper suitable for the implanting depth to the initial drill Ø2.0. Connect the crown guide appropriate for the size of the determined crown guide pin to the stopper. Carry out the initial drilling after connecting the drill, stopper and guide to the implanting position.(1000~1200RPM) Connect a multi crown guide suitable for the crown size to the crown guide pin and carry out […]
-
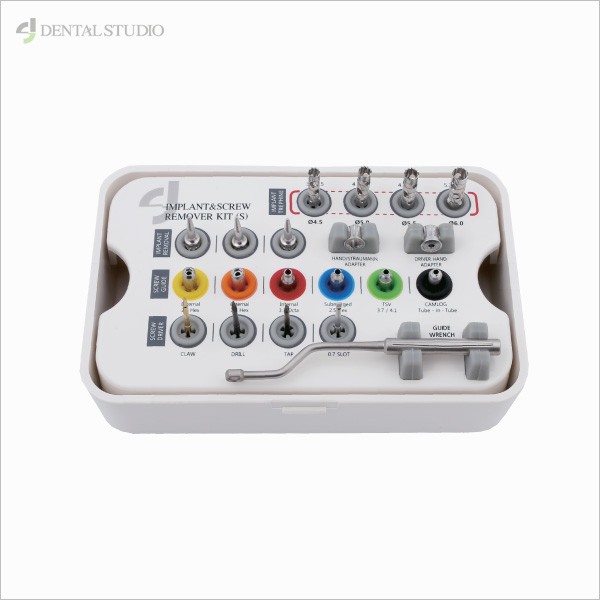
IMPLANT & SCREW REMOVER KIT(S)
Direction for use COMPONENT Trephine bur : Ø4.5, Ø5.0, Ø5.5, Ø6.0 – Used after installation to the engine handpiece when removing the implant from the mouth. Claw Driver : Used by turning counterclockwise to the broken surface of the abutment screw. Screw Drill : Drilling (1500~2000RPM) counterclockwise through the screw drill where the screw guide is installed when the broken not removed even with the claw driver. Tap Driver : Used by turning counterclockwise after drilling to the broker abutment screw. 0.7 Slot Driver : Used by turning counterclockwise to the broken abutment screw surface after drilling. Screw Guide : It aims at protecting the thread in the implant with the fixing to the implant. type : Active RP, External 2.7 Hex, 8° Morse Taper, Submerged 2.5 Hex, TSV 3.7/4.1, Camlog Tube-in-Tube Implant Remover : 3EA – Used for removing the implant by connecting to the ratchet, putting in the implant and turning counterclockwise. Hand / Strauman Adapter : Used for switching the driver for the handpiece to the hand or connection for the use of Strauman ratchet wrench. Driver Hand Adapter : Used for switching the driver for the handpiece to the hand or connection for the use of Strauman ratchet wrench. Implant Forcep : Used first for attempting the removal of an implant as the […]
-
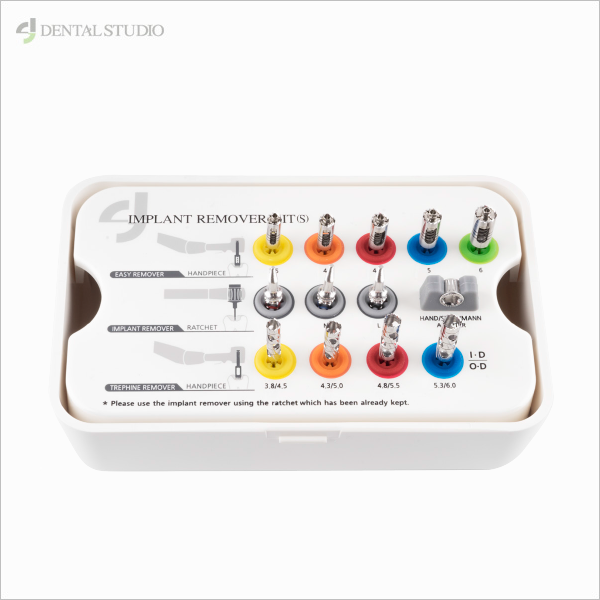
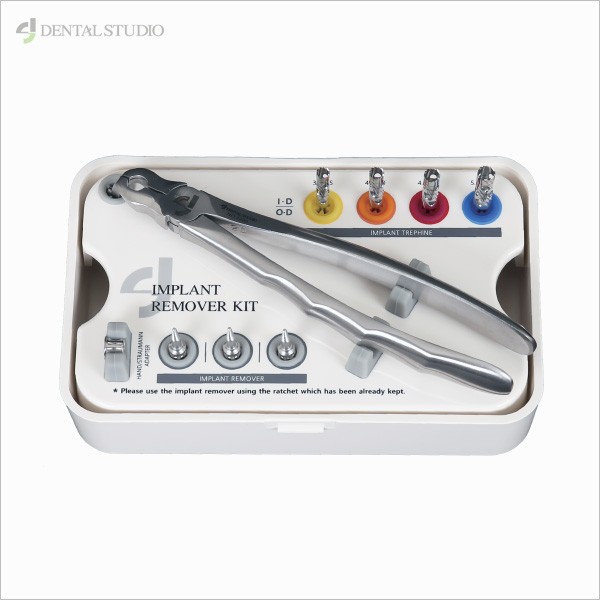
IMPLANT REMOVER KIT (S)
Direction for use COMPONENT EASY REMOVER : Ø3.5, Ø4.0, Ø4.5, Ø5.0, Ø6.0 This is used for removing the implant by fastening the guide tap to the fixture. Trephine : 3.8/4.5, 4.3/5.0, 4.8/5.5, 5.3/6.0 Used with connection to the engine handpiece when the implant is removed from the mouth. Implant Remover : Used for manual removal by turning conterclockwise with connection to the ratchet. [Small, Medium, Large] Hand/Strauman Adapter : Used for fixing the remover with hands in the implant or for connecting when Strauman Ratchet Wrench is used. Implant Forcep : Forceps dedicated to the implant used for removing the implant from the mouth.
-
IMPLANT REMOVER KIT
The more you see, the more you like. 심플하고 간편한 시스템 구성 IMPLANT REMOVER KIT
-
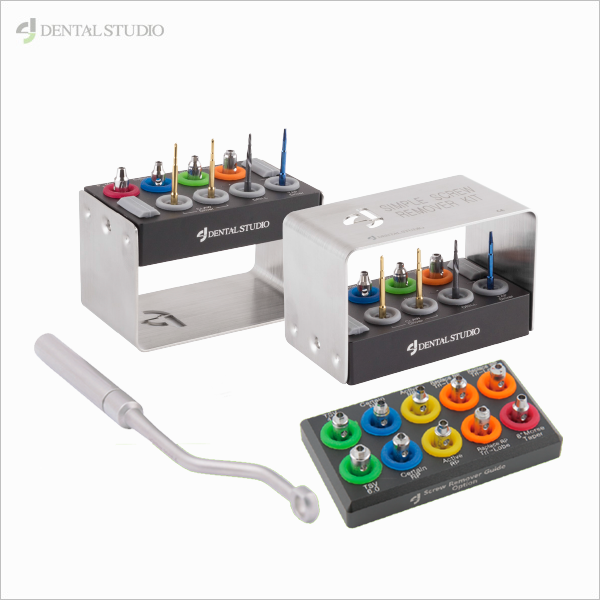
SIMPLE SCREW REMOVER KIT
Direction for use COMPONENT Claw Driver : Used by turning counterclockwise to the broken surface of the abutment screw. Screw Drill : Drilling (1500~2000RPM) counterclockwise through the screw drill where the screw guide is installed when the broken screw is not removed even with the claw driver. Tap Driver : Used by turning counterclockwise after drilling to the broker abutment screw. Screw Guide : It aims at protecting the thread in the implant with the fixing to the implant. Type : 8° Morse Taper, Submerged 2.5 Hex, TSV 3.7/4.1, Replace RP Guide Wrench : Used for fixing the screw guide to the implant. Used in combination as it is seperately installed to the bottom of the mini kit. Related ProductIMPLANT & SCREW REMOVER KIT(S)10000 Direction for use COMPONENT Trephine bur : Ø4.5, Ø5.0, Ø5.5, Ø6.0 – Used after installation to the engine handpiece when removing the implant from the mouth. Claw Driver : Used by turning counterclockwise to the broken surface of the abutment screw. Screw Drill : Drilling (1500~2000RPM) counterclockwise through the screw drill where the screw guide is installed when the broken not removed even with the claw driver. Tap Driver : Used by turning counterclockwise after drilling to the broker abutment screw. 0.7 Slot Driver : Used by turning […]
-
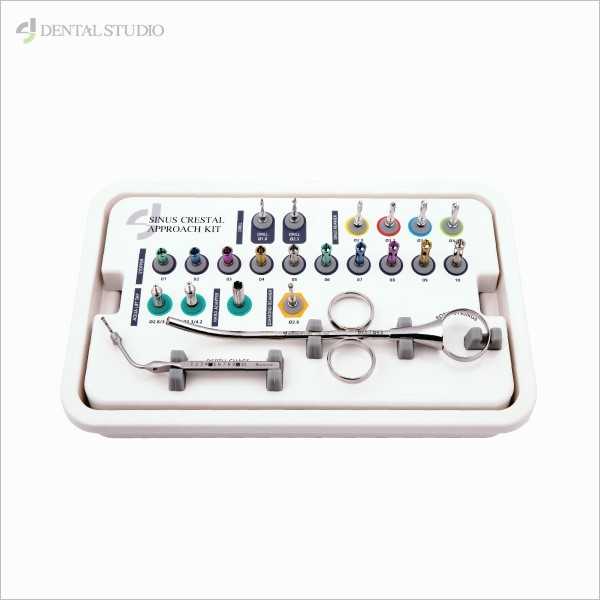
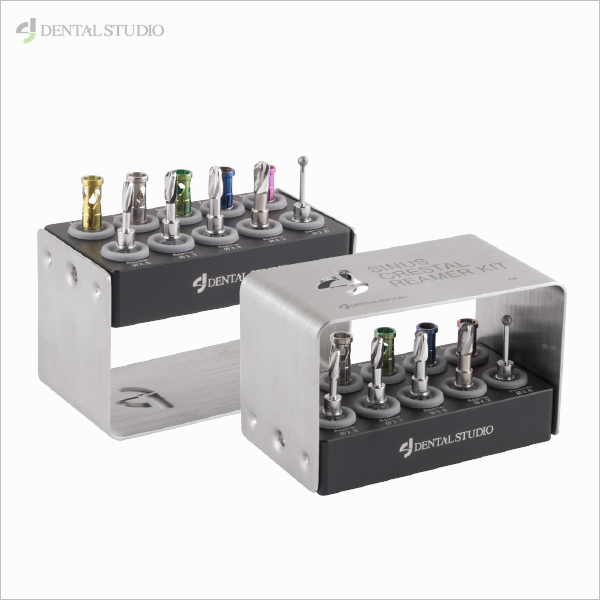
SINUS CRESTAL APPROACH KIT
Direction for use COMPONENT Stopper : 1mm, 2mm, 3mm, 4mm, 5mm, 6mm, 7mm, 8mm, 9mm, 10mm (10EA in total) – Possible of safe drilling after installing to the drill and reamer. Water pressure sinus handle adapter : Used for fixing Aqua Tip to the cortical bone in the maxillary sinus with the hands. Slicone Tube : Used for serration using water pressure in connection with Aqua Tip Syringe. Initial Drill : Ø1.8 Drill, Ø2.3 Drill (2EA in total), Possible of installing a stopper Connect a stopper to carry out drilling up to the cortical bone in the maxillary sinus. Sinus Reamer : Ø2.8, Ø3.3, Ø3.8, Ø4.2 (4EA in total), possible of installing a stopper. Sinus membrane shall not be drilled although sinus membrane is directly contacted after connecting a stopper and reaming the cortical bone. Diamond Bur : Possible of installing a Ø2.8 stopper – Sinus membrane is not drilled although sinus membrane is directly contacted, and it may be used for the fianl drill on the surgery at the same of confirming sinus membrane drilling. Aqua Tip : Ø2.8(2.8~3.8), Ø3.3(3.3~4.2) – Serrate sinus membrane safely using water after reaming the cortical bone in the maxillary sinus with the reamer. Depth Gauge : Possible of installing a stopper – Used for depth measurement and confirmation on […]
-
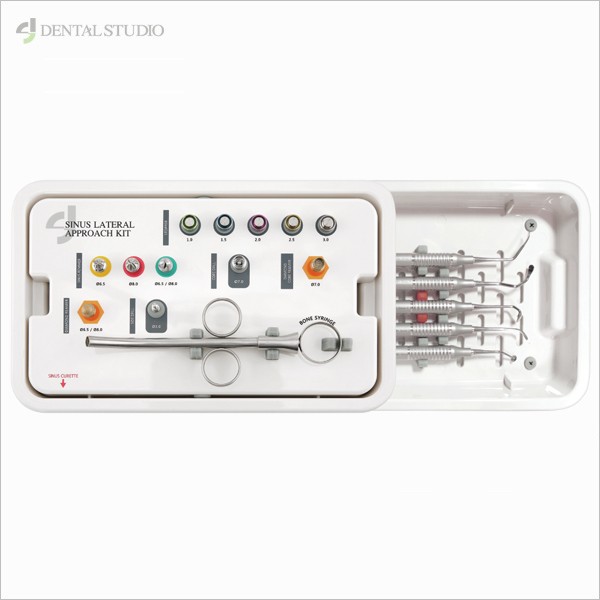
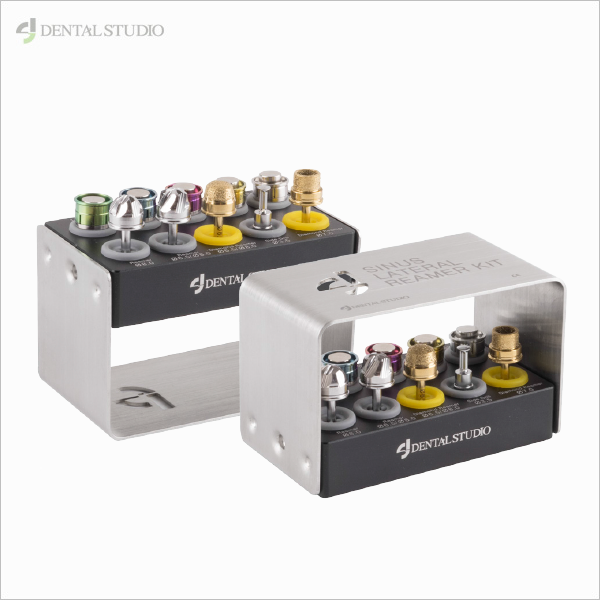
SINUS LATERAL APPROACH KIT
Direction for use COMPONENT Stopper : 1.0mm, 1.5mm, 2.0mm, 2.5mm, 3.0mm [Total 5EA] Sinus Reamer : Ø6.5, Ø8.0, Ø6.5/Ø8.0 [Total 3EA] Core Drill : Ø7.0 Diamond Reamer : Ø6.5/Ø8.0 Diamond Core Reamer : Ø7.0 Side Drill : Ø3.5 Drill Bone Syringe : Ø6.0 Sinus Curette : 5 Type HOW TO USE FIRST – Install the stopper to Ø6.5 reamer or Ø8.0 Reamer, and then carry out reaming while exchanging the stopper. – Use Ø6.5 / Ø8.0 Reamer for more flattened reaming or hole expansion to the reamed bone in the semi-circular shape. – Use the diamond Reamer Ø6.5 / Ø8.0 for safer reaming. In addition, Use the diamond reamer when you need to check whether or not the drilling has been carried out. – Use the side drill for trimming around the reamed bone or reaming the hole. – Use the reamer for reaming the sinus wall until the sinus membrane is exposed. Use the sinus curette to serrate the sinus membrane thereafter, and then carry out bone graft using the bone syringe or user’s own apparatus. – Place the implant when every process is finished. SECOND – Install the stopper to core Drill Ø7.0, and then carry out drilling while exchanging the stopper. – Use diamond core drill Ø7.0 for safer drilling. In addition, Use the […]
-
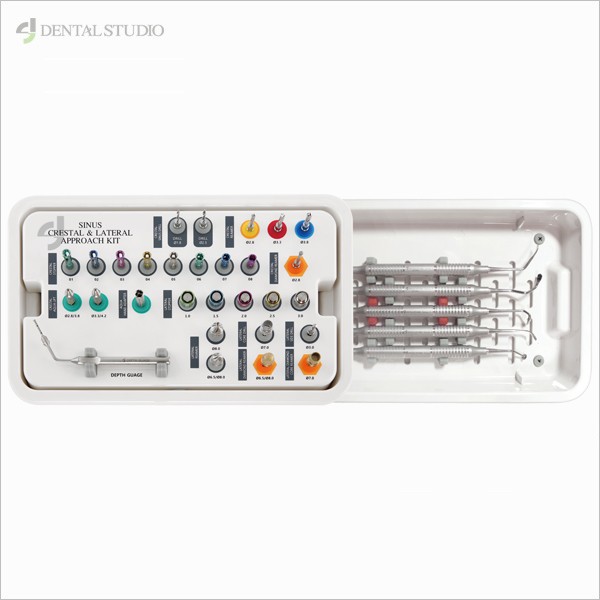
SINUS COMBINATION KIT
SINUS CRESTAL & LATERAL KIT COMPONENT Initial Drill : Ø1.8 Drill, Ø2.3 Drill [2EA] Crestal Reamer : Ø2.8, Ø3.3, Ø3.8 [3EA] Crestal Stopper : 8EA Crestal Diamond Reamer : Ø2.8 Crestal Aqua LIft : Ø(2.8~3.8)/Ø(3.3~4.2) Aqua Hand Adapter Lateral Stopper : 5EA Depth Gauge Lateral Reamer : Ø8.0, Ø6.5/Ø8.0 Lateral Core Drill : Ø7.0 Lateral Diamond Reamer : Ø6.5/Ø8.0 Lateral Side Drill : Ø3.5 Lateral Diamond Core Reamer : Ø7.0 Sinus Curette : 5EA
-
SIMPLE SINUS REAMMER KIT
CUSTOMIZE : Possible of customzing the stopper Related ProductSIMPLE SINUS LATERAL REAMMER KIT93 CUSTOMIZE : Possible of customzing the stopper Tags: simple, sinus, reammer, kit, customize, customzing, stopper
-
SIMPLE SINUS LATERAL REAMMER KIT
CUSTOMIZE : Possible of customzing the stopper Related ProductSIMPLE SINUS REAMMER KIT93 CUSTOMIZE : Possible of customzing the stopper Tags: simple, sinus, reammer, kit, customize, customzing, stopper
-
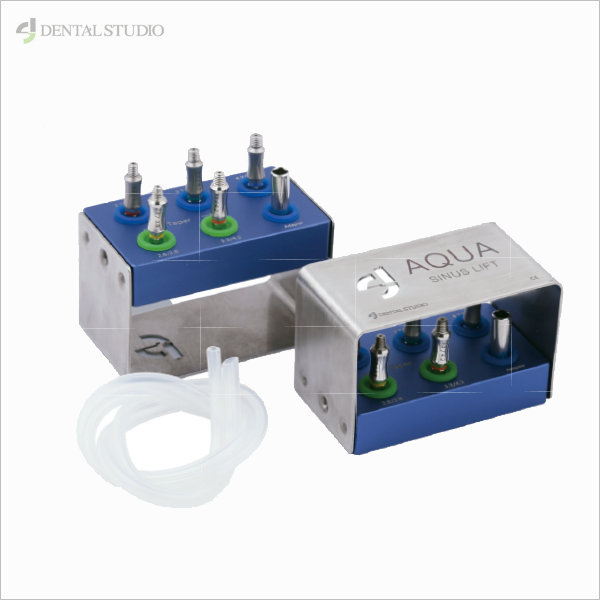
AQUA SINUS LIFT KIT
Direction for use COMPONENT Aqua Tip : Taper Type (For Hand-piece) : 2.3/3.8, 3.3/4.2 Used for serrating sinus membrane with water pressure after using the final sinus drill or reamer in line with the implant diameter. (Using a hand-piece and compatible adapter.) AQUA Tip : Straight Type (for Hand) : 3.2/3.5, 3.7/4.0, 4.2/4.5 Used for serrating sinus membrane with water pressure, after using the final sinus drill or reamer in line with the implant diameter. (For un adapter.) Aqua Hand Adapter : Used for connecting to Aqua Tip and fixing to the cortical bone in the mazillary sinus. Silicone Tube : Internal diameter Ø2.0, Internal diameter Ø3.0 Used for serrating with water pressure by connecting to Aqua Tip used for serrating with water pressure by connecting to Aqua Tip. HOW TO USE Install AQUA Tip Taper Type 2.3/3.8, 3.3/4.2 to a hand-piece of an implant engine and set to 30 rpm, and then fix it to the cortical bone in the maxillary sinus. (An adapter can be used as well.) Connect a silicon tube to a syringe to fill saline solution to the hose (internal diameter Ø2.0), and then connect the silicon tube to Aqua Tip to serrate the sinus membrane with the quantity of saline solution as desired. Install Aqua Tip Straight Type 3.2/3.5, […]
-
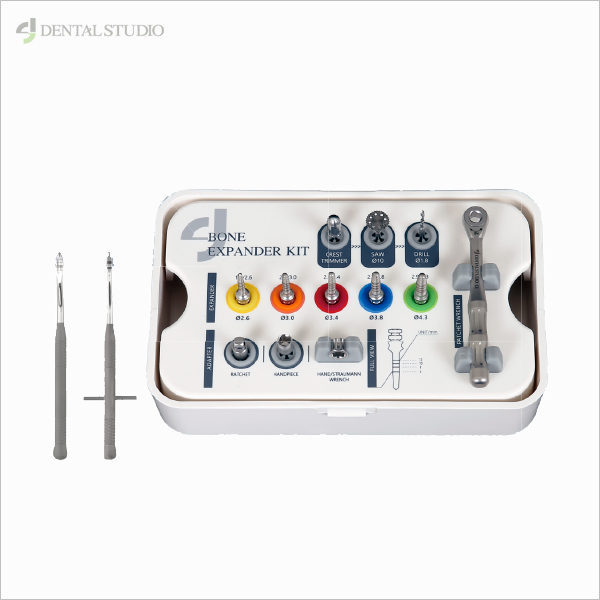
BONE EXPANDER KIT
기존의 Bone Expansion Set와 다르지 않습니다. 하지만, Dental Studio의 Variety of Tool로써, 더욱 빠르고, 안전한 수술을 약속합니다.
-
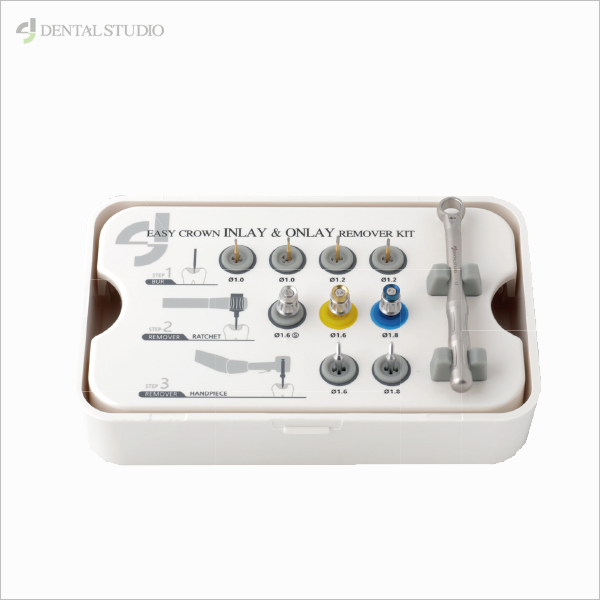
EASY CROWN INLAY & ONLAY REMOVER KIT
Direction for use COMPONENT Metal Cutting Bur Ø1.0, Ø1.2 Ratchet Remover Ø1.6(S), Ø1.6, Ø1.8 Handpiece Remover Ø1.6, Ø1.8 Ratchet HOW TO USE Form a hold to the section where removal will be carried out. 1) Use the metal cutting bur Ø1.0 or Ø1.2 included in the kit. – Be careful that the remover connection cannot be done if the hold becomes too large. – Be careful that you do not go over the cement line. (Make observation not to go over the cement line using a mirror) – Keep the angle of prosthetics and bur 90°. Carry out remover using the ratchet or hand. 1) Turn the remover with your hand, so that it can be connected around the hole. 2) Here, select the one-size larger remover in its dimension, if the remover is not connected but spins with no traction. 3) Turn clockwise using a dedicated ratchet, handpiece, handpiece driver, etc. (It is recommended that RPM should be set to 30~50RPM when removal is carried out with the handpiece.) 4) You can see the removing progress while observing the removal process. Shake and remove the targeted object thereafter. ※ Cautions in Use 1. Use the kit in consideration of the direction for prosthetics. 2.Ensure your observation / caution, so that you do not go […]
-
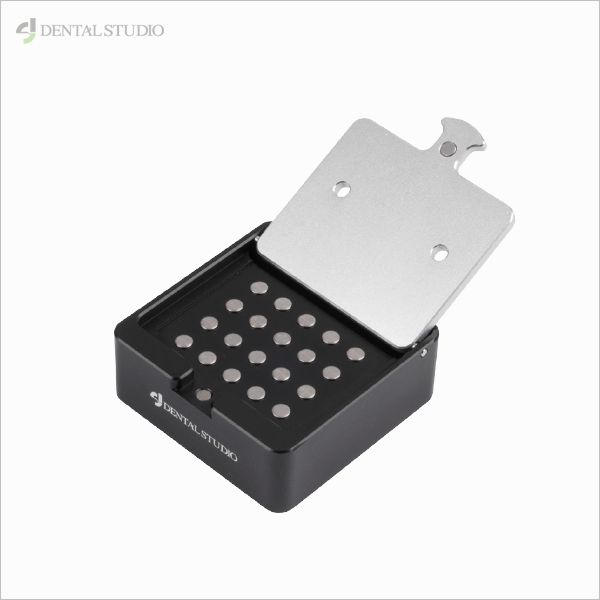
BONE COLLECTOR
기존의 타사 제품과는 다릅니다. DENTAL STUDIO의 철학을 담았습니다. Dental Studio만의 새로운 디자인으로, 편리한 시술을 보장합니다.
-
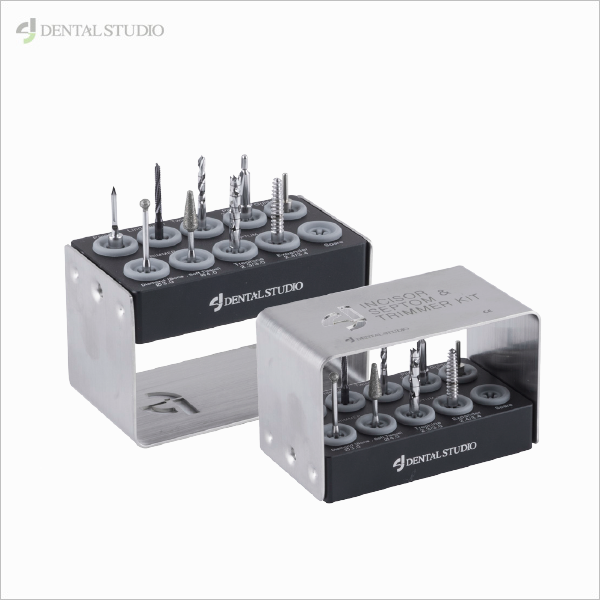
INCISOR & SEPTUM TRIMMER KIT
Direction for use COMPONENT Point Drill Ø2.0 : As it is designed for the possible placement of the implant onto the accurate position, the drill is not slippery on the implant placing position with the possible marking. Lindemann Drill Ø2.0 : It ensures the drilling for the desired direction and depth onto the implanting position during the initial drilling. Twist Drill Ø2.0 : The drilling can be done to the length of the implant. Pilot Drill Ø2.0/3.0 : The drilling can be easily done without resistance if it is used for the direction modification or before the next drilling after 2.0 Twist Drill is used. Guide Pin Ø2.0/3.0 : It is used when it is necessary to confirm the drill’s direction after 2.0 Twist Drill and Pilot Drill 2.0/3.0 are used. Diamond Bur Ø3.0 : It is used for the removal of inflammation or trimming of bone around the granulation tissue after the tooth extraction. Diamond Bur Ø1.8/4.0 : It is used for the removal of inflammation or trimming of bone around the granulation tissue after the tooth extraction. The tissue and inflammation can be removed faster and easier due to the taper design. Trephine Bur Ø2.3/3.0 : It is used for taking bones from the implanting position when the implant is placed onto the septum. Expander […]
-
SIMPLE BONE TACK
Direction for use COMPONENT A type : 1. Bone Tack Holder / 2. Remover Holder / 3. Bone TACK 5EA (Ø3.5 x 3mm) B type : 1. Bone Tack Holder / 2. Remover Holder / 3. Bone TACK 15EA (Ø3.5 x 3mm) Bone Tack Holder : Device to hold the Bone Tack and used at the same time with the mallet. Bone Tack Remover : Dedicated device used to remove the Bone Tack. Bone Tack : Used to fix the shield. Related ProductDR. OH SANG YUN100 FeatureIt is possible to fix the shield in a more stable manner by improving fracture strength and widening the head of the bone tack by 0.5,mm compared to that of the existing products.The bone tack design is newly established to prevent dropping, which helps in bone regeneration ability.Easier remover can be done using the remover provided together for bone tack remover. The bone tack holder is designed in the contra angle type for easy access in the oral cavity.Reasonable and economic with the mini kit consisting of essential components.Direction for use A type : 1. Bone Tack Holder / 2. Remover Holder / 3. Bone TACK 5EA (Ø3.5 x 3mm) B type : 1. Bone Tack Holder / 2. Remover Holder…Tags: bone, tack, remover, holderSIMPLE BONE TACK71Tags: bone, tackSIMPLE BONE TACK71Tags: […]
-
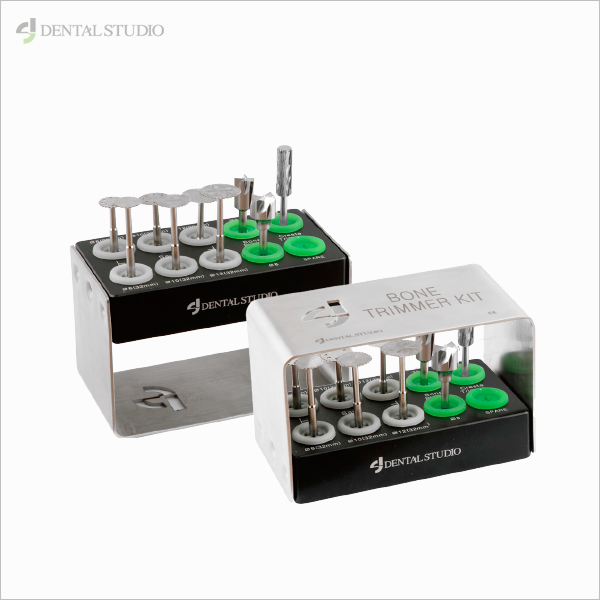
BONE TRIMMER KIT
Direction for use COMPONENT Crest Trimmer Ø5 : Used for trimming and flattening the narrow and thin bone in crest width. Bone Planer Ø6, Ø8 Saw : Used for sawing the bone. [Total 6EA] Ø8(22mm), Ø8(32mm), Ø10(22mm), Ø10(32mm), Ø12(22mm), Ø12(32mm)
-
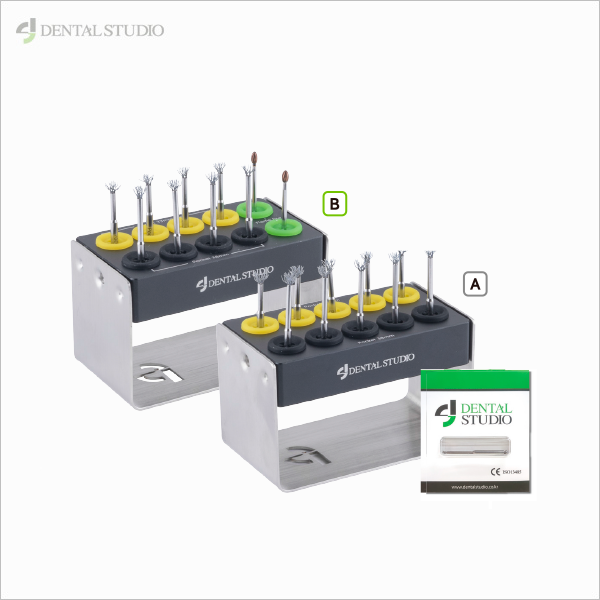
TITANIUM BRUSH
Direction for use COMPONENT
-
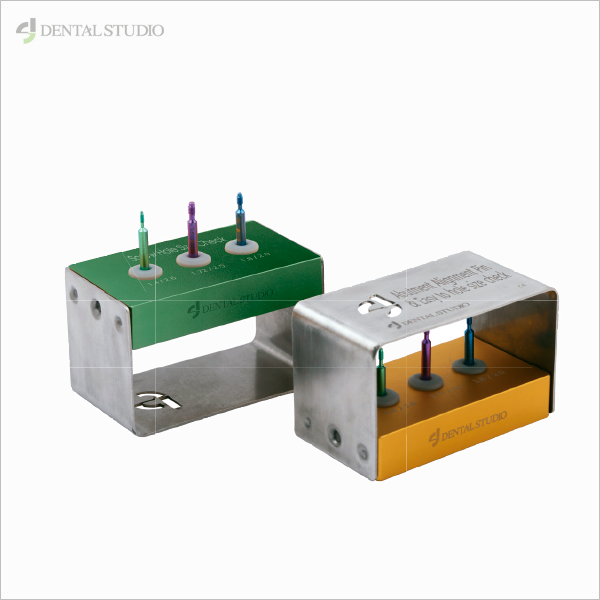
ABUTMENT ALIGNMENT PIN
AAP KIT Easy to implant hole size check Direction for use Grab an end of the PIN(A.A.P) to spin and insert to the implant inside. Ensure that the pin is not spinning without traction but accurately interlocking with the implant. Select the same size of thread if the interlocking of the implant is chkecked. * For further instructions, check the website for details. COMPONENT