Feature
- Advantage: You can simply make a 3D implant guide customized for your patient in the middle of your surgery.
- You can also select and assemble a guide respectively, depending on the crown diameter even in a multi case.
- You can plan the crown size and prosthetic appliance at the same time of implant placing.
- You can solve the depth and distance interval with only one drilling.
- Lego system in consideration of the prosthetic size.
- Ideal Stopper Design & Crown Guide Design
Direction for use

COMPONENT

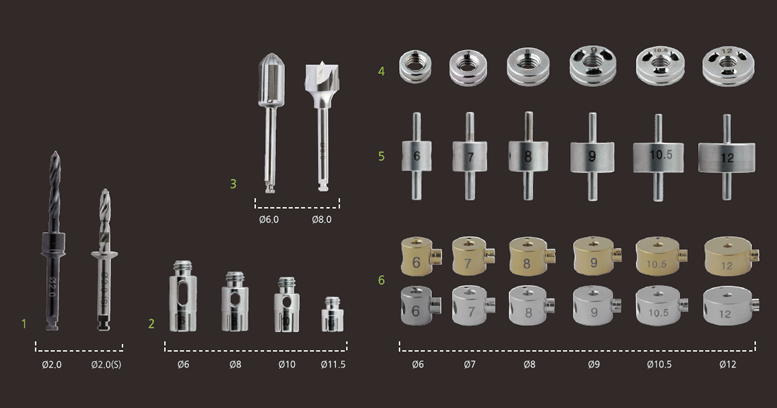
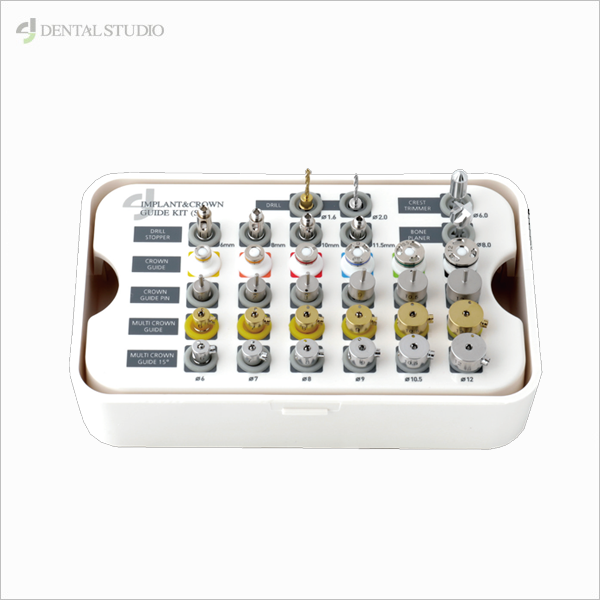
- Initial Drill : Ø2.0 (short), Ø2.0 (long) Used for the initial drilling.
※ Ø2.0 short drill is recommended for a multi guide for accessibility.
- Stopper : 6mm, 8mm, 10mm, 11.5mm It plays a role of a stopper in the initial drill.
- Crest Trimmer Ø6, Bone Planer Ø8 : Used to make flat the bone.
- Crown Guide : Ø6, Ø7, Ø8, Ø9, Ø10.5, Ø12 It provides the guide to the centering and directing with intervals appropriately for the crown size (implanted prosthetics) during the drilling.
- Crown Guide Pin : Crown Guide Pin It guides in determining the implanting position and crown size before the initial drilling.
- Multi Crown Guide It provides the guide for the continuous connection to the crown guide pin while two or more implants are being placed. -STR TYPE(Gold), CVD TYPE(Silver)
HOW TO USE
- Measure the size for the crown guide pin using tweezers on the implanting position.
- Connect a stopper suitable for the implanting depth to the initial drill Ø2.0.
- Connect the crown guide appropriate for the size of the determined crown guide pin to the stopper.
- Carry out the initial drilling after connecting the drill, stopper and guide to the implanting position.(1000~1200RPM)
- Connect a multi crown guide suitable for the crown size to the crown guide pin and carry out the drilling with Ø2.0 (short), after implementing 1~4 sequentially when the implants are placed continuously.
- Remove the multi crown guide from the crown guide pin after turning it 90°.


